TOOLS YOU WILL NEED
Before you begin, you will need to retrieve the “Terminal Swap-Out Toolkit” from the Manager’s Office. It’s a zip-lock bag that lives on top of the Battery Backup for the Micros Server. In it, you will find:
- A small Phillips screwdriver
- A tube of dielectric grease
- Small baggies to hold any screws removed from the Shift4 pin pad

BEFORE YOU START
Standing in front of the Micros terminal you are removing from service, tilt the terminal up (pull the bottom up and towards you) so you can see the connections.
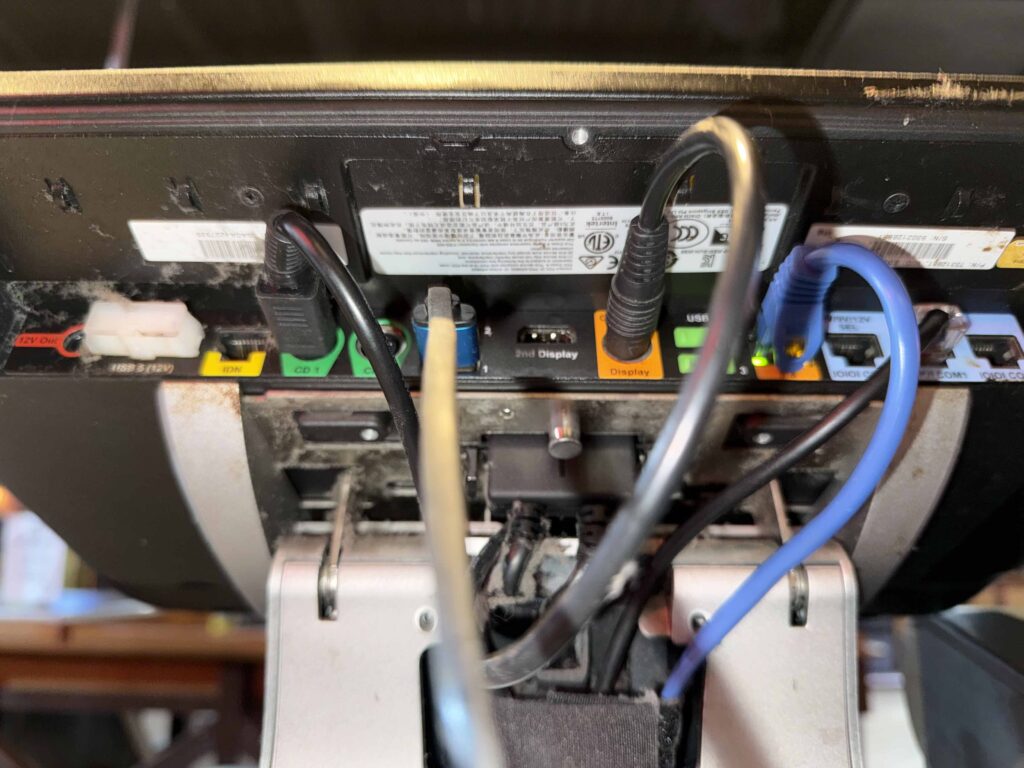
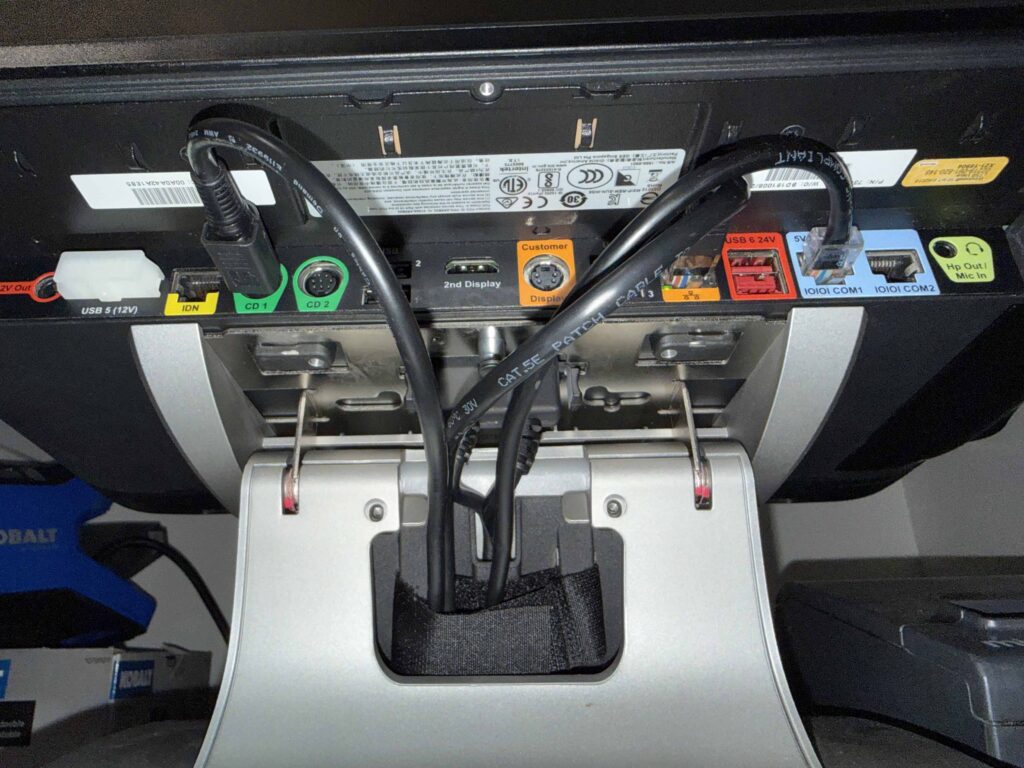
TAKE. A. PICTURE. of what wires go into what ports on the terminal! Take a picture from slightly below the ports so you can see how each port is labeled. We have several different generations of Micros terminals – the ports cannot be guaranteed to be the same from one terminal to the next. So, by taking a picture of what’s plugged into the ports of the “OLD” terminal, you’re more likely going to be successful getting the cables plugged into the proper ports of the “BACKUP” terminal.
There’s a “common color code” for all of the various “LAN-cable looking” cables that is slowly being rolled out as cables are replaced:
- GREEN (but might BLUE or BLACK): the LAN cable that plugs into the orange LAN jack of the Micros terminal
- ORANGE: the LAN cable that plugs into the dongle of the Shift4 terminal
- PURPLE (but might be black): the cable (looks like a LAN cable, but it’s not!) that connects the receipt printer
Acquire the equipment that you will be swapping in to replace the malfunctioning Micros terminal and Shift4 pin pad. The “BACKUP” Micros terminal and Shift4 pin pad live in Gary & Alan’s office on the shelf overlooking Gary’s Desk.
IMPORTANT NOTE: Once you’ve disconnected the “BACKUP” Shift4 pin pad, you have about seven minutes to get it plugged back in. This will be plenty of time to accomplish what you need to do if you follow these instructions IN THE ORDER WRITTEN!
POWER THE “BACKUP” MICROS TERMINAL DOWN
Any time you are plugging cables into or out of a Micros terminal, the terminal should be powered off!
The preferred way:
- Swipe your manager card on the Micros terminal
- From the Manager screen, click the “Minimize OPS” button
- Click on the Windows “Start” button in the lower left of the screen.
- Click on the little power icon (looks like a “O” with a line coming out of the top)
- Select “Shutdown”
- Wait for the terminal to power down
If the terminal is unresponsive, then the alternate (less-than-preferred way):
- Press and hold the power button on the lower left of the terminal frame until it powers down.
DISCONNECT CABLES FROM “BACKUP” MICROS TERMINAL
After verifying that the Micros terminal is powered down and you have a clear photograph of the entire set of ports under the terminal and what was plugged into each port, you can begin disconnecting the cables from the terminal.
There’s a large rectangular plug on the back of the terminal. It has clips on either side of it. Press those clips and gently pull the rectangular plug straight out from the terminal.
Next, there’s a silver, spring-loaded pin. Gently pull on this pin while gently sliding the terminal up to remove it from the terminal base. Set the “BACKUP” Micros terminal aside for now.
DISCONNECT “BACKUP” PIN PAD
As each Shift4 pin pad is keyed to each physical Micros terminal, if you move a Micros terminal, you also have to move the Shift4 pin pad.
Flip over the Shift4 pin pad, flip up the lever that covers the screws that hold the plug into the pin pad. Using the screwdriver from the “Terminal Swap-Out Tool Kit”, carefully remove the small screws.
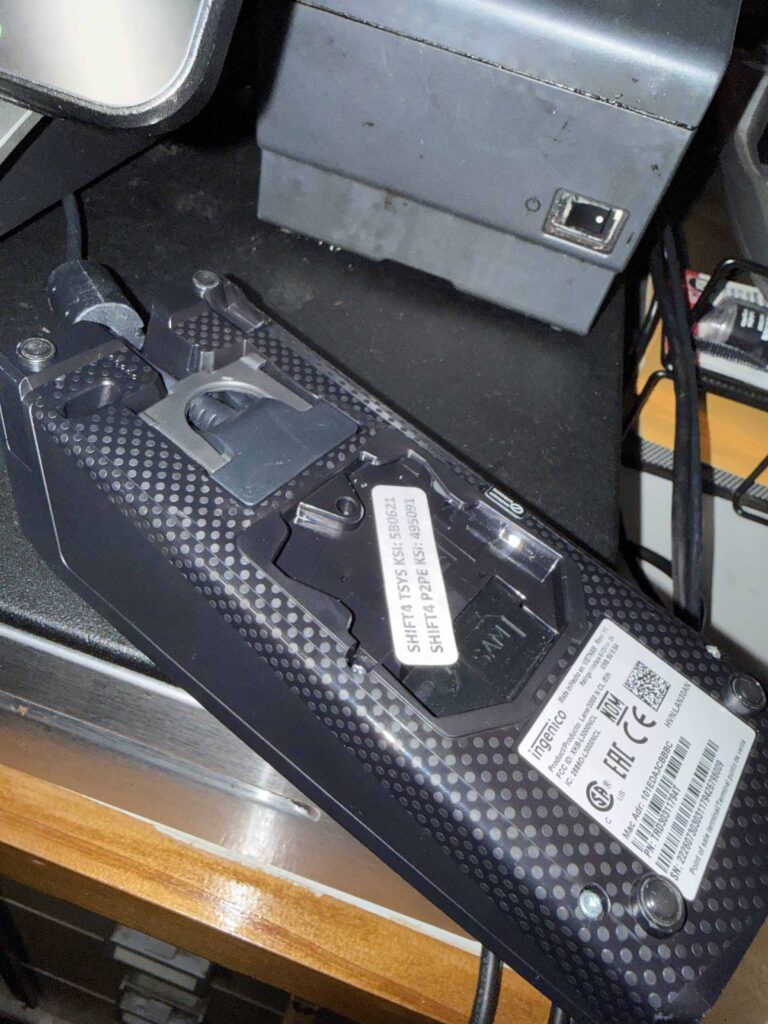
Put the screws into one of the little baggies found in the “Terminal Swap-Out Tool Kit” and put the baggie in your pocket to keep it safe. These are exceedingly hard to find, so please please please do your best to hang on to those screws!
On your watch or phone, bring up the STOP WATCH app.
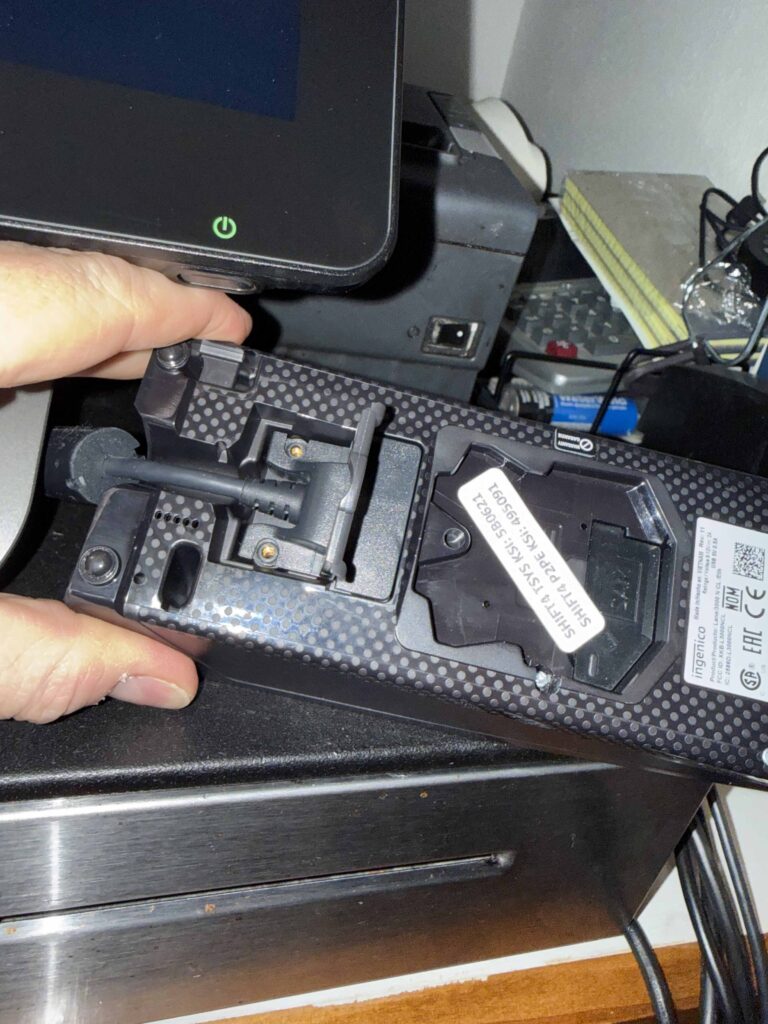
Using the flip-up lever that you flipped up to reveal the plug screws, gently pull up on the plug to pull it out of the pin pad. The plug looks like an HDMI port.
ONCE YOU REMOVE THAT PLUG FROM THE SHIFT4 PIN PAD, THE CLOCK IS STARTED ON HOW LONG THAT PIN PAD CAN BE REMOVED FROM THE NETWORK BEFORE THE SHIFT4 APPLICATION MUST BE RESTARTED, BRINGING CREDIT CARDS DOWN FOR THE ENTIRE BAR FOR 2-4 MINUTES!
Start the stop watch!
Grab the “Terminal Swap-Out Tool Kit” and transport the “BACKUP” Micros Terminal and Shift4 pin pad to the station with the terminal being swapped out.
DISCONNECT “OLD” SHIFT4 PIN PAD
Follow the exact same procedure as disconnecting the “BACKUP” Shift4 pin pad – including saving the screws. You can use the same little baggie that you used for the “BACKUP” Shift4 pin pad’s plug screws.
CONNECT “BACKUP” SHIFT4 PIN PAD
Gently plug the pin pad “HDMI-like” cable into the “BACKUP” Shift4 pin pad. DO NOT FORCE! It’s a little tricky to get it to line up and go into the receiving end of the plug. As this is a temporary swap out, just make sure the plug is firmly inserted. There’s no need to screw it in. Fold down the lever so that the bottom of the Shift4 pin pad is flat – and will sit flat.
The “BACKUP” Shift4 pin pad will immediately begin powering up.
Stop the stop watch. Hopefully you got it done within seven minutes!
POWER DOWN, DISCONNECT AND UN-MOUNT “OLD” MICROS TERMINAL
Follow the exact same procedure as disconnecting the “BACKUP” Micros terminal above – INCLUDING POWERING IT DOWN FIRST AND GETTING A CLEAR PHOTOGRAPH OF ALL OF THE PORTS ON THE BOTTOM OF THE MICROS TERMINAL AND WHAT IS PLUGGED INTO THEM.
MOUNT “BACKUP” MICROS TERMINAL
Slide the “BACKUP” Micros terminal onto the mounting bracket of the base. The silver pin will auto-click to secure the terminal onto the base.
PLUG THE RECTANGULAR CABLE INTO THE “BACKUP” MICROS TERMINAL
Verify the large black rectangular plug is firmly seated into the back of the “BACKUP” Micros terminal.
MAKE BOTTOM CONNECTIONS TO “BACKUP” MICROS TERMINAL
Before inserting the LAN cable into the “BACKUP” Micros terminal, squeeze out a small dab of dielectric grease and apply it to EACH END of EACH LAN cable – the cable that goes from the jack to the Micros terminal and the cable that goes from the jack to the Shift4 pin pad. This will prevent water from creeping into the connection and causing issues going forward.
Using the clear photograph you took before you disconnected the “OLD” Micros terminal, insert each plug into the appropriate port:
- The round “DIN” pin with the square edge should plug into the “CD 1”. This is your Cash Drawer.
- The round “DIN” pin with a round handle should plug into the “Display” port. This is your customer-facing display. NOTE: DO. NOT. FORCE! If the plug doesn’t plug into the port, you may have mixed up the Cash Drawer and Display plugs. You should be able to examine the pins on the plug and count the number of openings on the port to determine if you’ve got the right plug. But please, DO NOT FORCE!
- Plug the LAN cable into the orange port of the Micros terminal – NOT ONE OF THE TWO or THREE “COM” PORTS (which are blue)!
- Plug the receipt printer’s cable (looks just like the LAN cable – same plug type!) into the blue “COM1” port.
POWER UP AND TEST
Press the power button on the lower right of the Micros terminal’s frame to turn on the terminal.
VERIFY NETWORK CONNECTION: You should see the little LEDs on the LAN port light up with a solid orange light and with a blinking green light within a few seconds of power-up. That’s one way to determine/ensure that you’ve got the LAN cable plugged into the proper port.
The terminal will continue to boot up.
Once at the “Clock-In” screen, swipe your Manager card and click the “Change Reg ID” button. Select the register that you just swapped out for the new “BACKUP” Micros terminal.
Verify Device Connections:
- VERIFY RECEIPT PRINTER CONNECTION: Print a Clock-In report to verify that the Receipt Printer is correctly connected.
- VERIFY CASH DRAWER CONNECTION: Pop the drawer with a “No Sale” to ensure the Cash Drawer is correctly connected.
- VERIFY SHIFT4 PIN PAD CONNECTION:
- Ring in a “Glass Water” and try to pay with a credit card to ensure
communication with the Shift4 pin pad. - Click the “Pickup Check” button and select the button
representing the glass of water. - Void off the Glass Water item.
- Ensure that the check total is $0.00.
- Click the “Cash” button to close out the tab for cash. You’ll get a pop-up about “Prior authorizations exist – abort payment?”. Click “NO”.
- The check will then be closed out for $0.
- Ring in a “Glass Water” and try to pay with a credit card to ensure
Return “OLD” Micros Terminal and Shift4 pin pad to the Manager’s Office.
Tape the little baggie of screws to the Shift4 pin pad.
RETURN THE MICROS TERMINAL SWAP-OUT KIT TO THE OFFICE WHERE YOU FOUND IT!
PROBLEMS?
Call Kevin!


